Top 5 Most Common Issues with Consumer Electronics Peripherals And How to Fix Them Easily
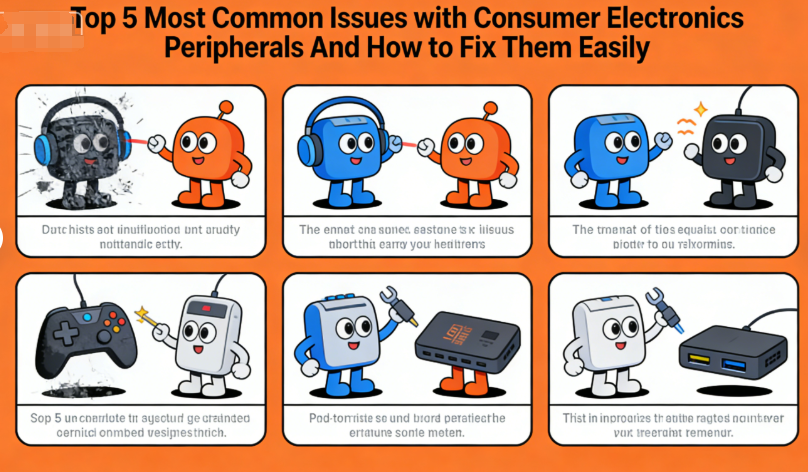
Top 5 Most Common Issues with Consumer Electronics Peripherals (And How to Fix Them Easily)
Consumer electronics peripherals—from phone chargers and wireless earbuds to LED strips, Bluetooth speakers, and USB hubs—are essential parts of our daily lives. We rely on them to charge our devices, listen to music, work from home, and brighten our spaces. But there’s one thing all these peripherals have in common: they’re prone to frustrating, frequent issues that leave us scrambling for solutions.
Whether your power bank stops working suddenly, your wireless earbuds won’t charge, or your LED strips flicker nonstop, these problems are more than just annoying—they disrupt your routine. The good news? You don’t need to be a tech expert to fix most of them. In fact, many common consumer electronics peripheral issues have simple, quick solutions that anyone can do at home.
1. Phone Chargers & Power Banks Stop Working Suddenly (The #1 Complaint)
There’s nothing more frustrating than grabbing your phone charger or power bank when your battery is dying—only to find it won’t charge at all. This is the most common issue with consumer electronics peripherals, and it happens to nearly everyone. The good news? It’s rarely a permanent problem.
Why It Happens
The main causes of sudden failure in phone chargers and power banks are:
- Dirty or damaged ports: Lint, dust, or debris gets stuck in the USB port (on the charger, power bank, or your phone), blocking the connection.
- Overheating or voltage spikes: Cheap, uncertified chargers/power banks can’t handle voltage fluctuations (common with wall outlets), leading to internal component burnout.
- Loose or frayed cables: Bent or broken wires inside the charging cable disrupt power flow.
- Power bank over-discharge: Leaving a power bank unused for months can drain its internal battery completely, making it unresponsive.
How to Fix It Easily
Try these steps (in order) to get your charger or power bank working again:
- Clean the ports: Use a toothpick (gently!) or a can of compressed air to remove lint/dust from the USB port of your charger, power bank, or phone. Never use metal tools—they can damage the ports.
- Test a different cable or outlet: Swap out the charging cable for a known-good one (e.g., your phone’s original cable) and plug it into a different wall outlet. If the charger works with a new cable, the old one was faulty.
- Reset your power bank: Most power banks have a small reset button (use a paperclip to press it) or can be reset by holding the power button for 10-15 seconds. This fixes over-discharge issues.
- Avoid cheap, uncertified products: If your charger/power bank is burnt out, replace it with a certified one (e.g., Anker, Apple, Samsung) to prevent future failures.
Pro Tip: If your power bank smells burnt or feels extremely hot, stop using it immediately—it’s a safety hazard.
2. Wireless Earbuds Not Charging or Battery Draining Too Fast
Wireless earbuds (e.g., AirPods, Galaxy Buds, budget Bluetooth earbuds) are one of the most popular consumer electronics peripherals—but they’re also prone to two big issues: not charging when placed in the case, or battery life that drains faster than expected. These problems ruin your listening experience, but they’re easy to fix.
Why It Happens
Common causes of wireless earbud charging/battery issues:
- Dirty charging contacts: The metal contacts on the earbuds or charging case get covered in oil, dust, or earwax, blocking the charging connection.
- Charging case issues: The case’s battery is dead (for wireless charging cases) or the case’s USB port is dirty/damaged.
- Software glitches: Outdated firmware on the earbuds can cause battery mismanagement, leading to fast drainage.
- Misuse: Leaving earbuds in extreme temperatures (too hot or too cold) damages the battery, reducing its lifespan.
How to Fix It Easily
Fix charging issues and extend battery life with these steps:
- Clean the charging contacts: Use a cotton swab dipped in isopropyl alcohol to gently wipe the metal contacts on the earbuds and charging case. Let them dry completely before charging.
- Charge the charging case: Plug the case into a certified charger (not a cheap USB hub) and let it charge for at least 30 minutes. If it’s a wireless charging case, ensure it’s properly aligned on the charging pad.
- Reset your earbuds: Most earbuds can be reset by holding the pairing button on the case for 10-15 seconds (check your earbuds’ manual for exact steps). This fixes software glitches.
- Update firmware: Connect your earbuds to your phone’s app (e.g., AirPods app, Galaxy Wearable) and install any available firmware updates—this often fixes battery drainage issues.
- Store them properly: Keep your earbuds at room temperature (avoid direct sunlight or cold cars) and charge them regularly (don’t let them fully drain every time).
3. LED Strip Lights Flicker, Dim, or Burn Out Quickly
LED strip lights, LED desk lamps, and LED string lights are popular for home decor, gaming setups, and workspace lighting—but they frequently flicker, dim, or burn out long before their expected lifespan. These issues are usually caused by simple mistakes, not faulty LEDs.
Why It Happens
Common causes of LED strip light issues:
- Undersized power supply: Using a power adapter with a lower current rating than the LED strip requires (e.g., a 1A adapter for a 2A LED strip) causes voltage drops, leading to flickering/dimming.
- Poor connections: The LED strip’s connectors are loose or dirty, disrupting power flow to the LEDs.
- Overheating: LED strips left on 24/7 or placed in enclosed spaces (no ventilation) overheat, damaging the LEDs and driver.
- Cheap, low-quality LEDs: Budget LED strips use low-grade LEDs that burn out quickly (especially 3528 strips with low brightness).
How to Fix It Easily
Stop flickering, dimming, and premature burnout with these fixes:
- Use the correct power supply: Check the LED strip’s label for current/voltage requirements (e.g., 12V/2A) and use an adapter that matches or exceeds those specs (never use a lower current adapter).
- Secure connections: Unplug the LED strip, clean the connectors with a cotton swab, and reattach them firmly. If the connectors are damaged, replace them with new ones (available for $2-$5 online).
- Prevent overheating: Don’t leave LED strips on 24/7 (use a timer if needed) and avoid placing them in enclosed spaces (e.g., behind furniture without airflow). Add a small heat sink to the LED driver (if accessible) for extra cooling.
- Replace low-quality strips: If your LED strip burns out quickly, upgrade to a high-quality 5050 LED strip (brighter and more durable) from a reputable brand (e.g., Philips, Govee).
Pro Tip: If only part of the LED strip flickers, the issue is a loose connection or damaged LED—cut the strip at the nearest cut mark and reattach the working part.
4. Bluetooth Speaker Disconnection & No Sound Issues
Bluetooth speakers, Bluetooth receivers, and Bluetooth soundbars are essential for wireless audio—but frequent disconnections, lag, or no sound are common frustrations. These issues usually stem from Bluetooth signal interference or simple setup mistakes, not faulty hardware.
Why It Happens
Common causes of Bluetooth speaker issues:
- Signal interference: Other Bluetooth devices (phones, laptops, smartwatches), Wi-Fi routers (2.4GHz), or metal objects block the Bluetooth signal, causing disconnections.
- Low battery: A low battery in the Bluetooth speaker reduces signal strength, leading to disconnections and no sound.
- Pairing issues: The speaker is still paired with an old device (e.g., your old phone), preventing it from connecting to your current device.
- Outdated firmware: Old firmware on the speaker can cause compatibility issues with newer phones/laptops.
How to Fix It Easily
Fix Bluetooth disconnections and no sound with these simple steps:
- Reduce interference: Move the Bluetooth speaker closer to your device (within 10 feet), turn off other Bluetooth devices, and keep the speaker away from Wi-Fi routers and metal objects (e.g., refrigerators, metal shelves).
- Charge the speaker: Plug the speaker into a charger and let it charge for at least 1 hour—low battery is the #1 cause of weak Bluetooth signals.
- Reset pairing: Unpair the speaker from all devices (go to Bluetooth settings on your phone/laptop and select “Forget This Device”), then turn the speaker off and back on. Re-pair it with your device as a new Bluetooth device.
- Update firmware: Check the speaker’s manual for how to update its firmware (many speakers can be updated via a phone app or USB). This fixes compatibility issues with newer devices.
- Check audio settings: Ensure your device’s volume is turned up, and the speaker is set as the default audio output (go to sound settings on your phone/laptop).
5. USB Hubs & Laptop Adapters Overheat & Smell Burnt
USB hubs (for connecting multiple devices to your laptop) and laptop power adapters are workhorses for remote workers and students—but overheating and burnt smells are common, and they’re more than just annoying: they’re a safety risk. If your USB hub or laptop adapter feels hot to the touch or smells burnt, act quickly.
Why It Happens
Common causes of USB hub/laptop adapter overheating:
- Overloading: Plugging too many high-power devices into a USB hub (e.g., external hard drives, chargers, LED lights) exceeds the hub’s power capacity, causing overheating.
- Cheap, uncertified products: Budget USB hubs and laptop adapters use low-quality components that can’t handle normal power loads, leading to overheating and burnout.
- Blocked ventilation: Placing the USB hub or adapter under a pillow, on a bed, or in a tight space blocks airflow, trapping heat.
- Damaged cables: Frayed or damaged power cables for laptop adapters cause short circuits, leading to overheating and burnt smells.
How to Fix It Easily (And Safely)
Safety first! Follow these steps to fix overheating and prevent hazards:
- Unplug immediately: If your USB hub or adapter smells burnt or feels too hot to hold, unplug it right away—don’t use it until you’ve fixed the issue.
- Reduce load: For USB hubs, unplug high-power devices (e.g., external hard drives) and only plug in essential devices (e.g., a mouse, keyboard). Use a powered USB hub (one that plugs into a wall outlet) for high-power devices.
- Improve ventilation: Place the USB hub or adapter on a flat, hard surface (e.g., a desk) with plenty of airflow—never under blankets, pillows, or in tight spaces.
- Replace damaged cables/adapters: If the power cable is frayed or the adapter smells burnt, replace it with a certified one (match the laptop’s voltage/current specs exactly). For USB hubs, replace cheap, uncertified ones with a reputable brand (e.g., Anker, Belkin).
Pro Tip: A powered USB hub (with its own power adapter) is better for high-power devices—it distributes power evenly and prevents overheating.
Final Thoughts
Consumer electronics peripherals make our lives easier—but their common issues can be frustrating. The good news is that most of these problems (suddenly dead chargers, uncharging earbuds, flickering LEDs, Bluetooth disconnections, and overheating USB hubs) have simple, affordable fixes that anyone can do at home. You don’t need to be a tech expert—just a little patience and the right steps.
Need More Help With Consumer Electronics Peripherals?
If you’re dealing with a tricky issue we didn’t cover, or need recommendations for high-quality peripherals that won’t let you down, our team is here to help.
- ? Email:
hyc2355937758@gmail.com
- ? Phone: +86-18824523083/ +86-15913754866
- ? Official Website: www.barronmlcc.com
- ? Product Guide: Explore more tips to fix common device issues
Top 5 MLCC Issues in Consumer Electronics Peripherals And Easy Fixes You Can Do
How to Solve LED Driver IC Overheating in Consumer Electronics Peripherals A Complete Guide
مقالات لها صلة